25/Sep/2024- 11/Oct/2024 (week 1-week 4)
ZHANG HANYUAN/0363727/Bachelor of Design (Honors) in Creative Media
Advanced Typography/Taylors University
Task 1: Exercise - Typesetting Systems and Finding Types
LECTURES SUMMARY:WEEK 1 LECTURES:
In week 1, Vinod introduced us to the module requirements and semester assignments!
During this week, we had to complete eight printing systems
- Axial
- Radial
- Extended
- Random
- Grid
- Modular
- Transition
- Bilateral
1-Axial System
All elements are aligned to the left or right of a single axis, which can be curved
fig.1,1 Axial System
2-Radial System
All elements extend from a single focus and can have multiple focuses.
fig.1.2 Radial System
3-Dilatational System
All elements expand in a circular manner from a central point, and with a layered approach can use multiple circles with messages
fig.1.3 Dilatational System
4-Random System
Elements don't have a specific pattern or relationship, but there is a method in the chaos of creation.fig.1.4 Random System
5-Grid SystemElements have different weights and sizes depending on the different grid builds within the page
6-Modular System
A range of elements for standardised unit construction
7-Transitional System
Informal hierarchical banding system with different elements arranged hierarchically in different bands
fig.1.7 Transitional System
8-Bilateral System
All elements are arranged symmetrically on one axis, there can be multiple axes
fig.1.8 Bilateral System
WEEK 2 LECTURES:
The dominant principles underpinning design composition: isolation, repetition, symmetry, asymmetry, alignment, perspective (abstract concepts).
Abstract concepts are more relevant to images than complex information composed of different elements.
fig.2.1 Emphasis
The principle of thirds is a photographic guide to composition, where a frame or space can be divided into three columns and three rows. Intersecting lines are used as points of interest.
fig.2.2 THE RULE OF THIRDS
Printing system: basically consists of eight different systems. The most used system is the raster system (derived from the grid compositional structure of letterpress printing) Post-modern printing systems explore chaotic randomness, asymmetry, but legibility and readability are relegated to the background.
FIG.2.3 PRINTING SYSTEM
fig.2.4 POST-MODERN PRINTING SYSTEM
Environment Grid: Used to create organizations and structures. Based on the exploration of structures or multiple structures organized together. It can be basically anything that creates a structure.
fig.2.5 ENVIRONMENT GRID
Designated by Mr. Vinod, based on an exploration of existing grid systems. The placement of forms creates movement on many pages. Both paper and screen. Forms can represent images, text or colors.
fig.2.6 MOVEMENT
WEEK 3 LECTURES:
Context&Creativity
The first machinery produced letter forms when directly imitating handwriting, and handwriting became the basis or standard machinery for forms, spacing, and conventions.
Influenced by the materials used: sharp bones, steaks, plant stems, brushes, feathers, pens all contribute to the unique form of the typeface.
fig.3.1 Cuneiform
Chisel writing was the earliest writing system involving hieroglyphics, and chisel writing was written from left to right.
The system is a hybrid of drawing and speech characters.
Hieroglyphics (2613–2160 B.C.E.)The Egyptian writing system incorporated a mixture of relief and plosive, phonetic sounds.
Hieroglyphics expressed words in three different ways
Representing what is actually described
The symbols in front represent the general meaning of the word
As sounds to spell out a word.
fig.3.2 hieroglyph
Early Greek(5th C. B.C.E.)
The Greeks adopted the Phoenician system, adding the necessary vowel words into the line, and the direction of reading was not yet fixed. Early Greek letters were drawn freehand, without serifs. Then the strokes began to thicken and serifs began to appear.
Roman inscriptions written with flat brushes tilted like those written with broad-nibbed fountain pens were carved into stone with mallets and chisels.
Roman Uncials (4th c. C.E.)Roman letters began to become rounded, curved, and could be written faster with fewer strokes.
English Half Uncials
evolved into a more slanted, concise form.
Carolingian Minuscule
Sentences are written with the convention of capitalization and spaces between word punctuation marks. It is a fifteenth-century humanist mode of writing and is the basis for our lowercase Roman script.
fig.3.4 Carolingian Minuscule
Black Letter (12-15 C. CE).
Black letters have small line spacing and compact fonts. Black letters with proper vertical spacing.
The oldest script - known as ivc script - was found in the Indus Valley of the Indian subcontinent. So far there is no convincing decipherment, and it has more of a symbolic nature.
The Brahmi script is the parent script of most of the Indian subcontinent and is one of the oldest and most influential writing systems in India. Modern Indian and Southeast Asian scripts were developed from the Brahmi script.
Pallava script.
A South Indian script originally used for Thai language and writing Sanskrit
Learning handwriting is important for design because all digitized letters are derived from handwriting
Vernacular Multi-Script Fonts
to accommodate vernacular communication of written content, is a combination of Roman or English scripts without letters or vernacular letters.
WEEK 4 LECTURES:
Designing Type
Design has a social responsibility
The principle that fonts must be readable
Frutiger (1968) is a sans-serif typeface, a clean, distinctive and legible typeface.
Typefaces from a research perspective: the need for evidence of legibility
Frutiger was subsequently extended to Arabic forms and is widely used.
A new typeface was designed in India with the goal of simplifying sacred characters without compromising ancient calligraphic expressions.
Matthew Carter designs a font for use by Microsoft. Guaranteed to be legible on screen and clear as text at small sizes. Exhibits a pixelated character.
Bell Centennial in order to adapt the ink to paper and printing
Edward Johnson London Underground Type Founders A warm blend of classical Roman proportions and humanism.
Research the general process: sketching and digitizing.
Must know type history, anatomical types, terminology, font history during creation.
Sketching
traditional hand drawing/drawing on software.
Specialization: using adobe illustration or professional font software.
FIG.4.1 SOFTWARE
Testing: part of the process of correcting all aspects of the typeface.
Checking fonts for validity: displaying type, text testing type
Fonts are constructed in a square grid.
FIG.4.2 GRID
Notes:
An important visual correction is the curves and bulges, also the distance between fonts needs to be visually corrected.
WEEK 5 LECTURES:
INSTRUCTION
Week 1 - Exercise 1 Typographic SystemsAssignment: Use InDesign software to explore eight typographic systems this week.
Dimensions 200✖200mm.
Graphic elements are allowed
Color: Black, other colors are allowed
1.Axial Systemfig.1.9
2.Radial System
3.Dilatational System
4.Random System
5.Grid System
7.Transition System
Mr. Vinod said that everything I did was ok.In the end, I chose 8 out of the 10 to submit for the final task 1.
Final Task 1 -Exercise 1 Typographic Systems
JPEG:
fig.1.19.Axial System
fig.1.20.Bilateral System
fig.1.21.Modular System
fig.1.22.Grid System
fig.1.23.Random System
fig.1.24.Radial System
fig.1.25.Dilatational System
fig.1.26.Transition System
fig.1.28.Without grid
Week 2-Exercise 2-Finding Type (Type & Play)
This week, we need to choose man-made objects, structures, or things in nature, analyze the font images contained in them, and create these fonts.
1.Inspiration
After searching and browsing a lot of pictures, I chose snowflakes and leaves as the images to analyze.
fig.2.1 Chosen image (snowflakes)
fig.2.2 Chosen image (foliage)
I then used Adobe illustration software to trace and dissect the font forms
fig.2.3 Traced letters (foliage)
fig.2.4 Traced letters (snowflakes)
Finally, I chose to dissect the fonts from snowflakes because the font style of snowflakes is more distinctive, and I like the diversity in snowflake patterns (because snowflakes don’t have only one shape, there are branch shapes, as well as different types such as plates, needles, columns, etc., which depend on the temperature and humidity conditions when they are formed).
fig.2.5.Letter Extraction
The reference typeface I chose was Gill Sans Std Regular, which fits the direction I wanted to go with the typeface development very well.
fig.2.6.Reference Letter
I overlapped the typeface I dissected from the snowflake image with the reference typeface I chose, Gill Sans Std Regular.
fig.2.7 First attempt
I adjusted the width and height of the font and simplified its shape to make it look more standardized overall.
fig.2.8 Second attempt
I modified the "A" and "Y" twice, first by simply overlapping them, and then by simply highlighting the elements.
fig.2.9 Two changes of A

fig.2.10 Two changes of Y
In the third week, after class guidance from Mr. Vinod, he said that ‘A’ and ‘Y’ were fine and did not need to be changed, and asked me to change the remaining letters into elements similar to ‘A’ and ‘Y’ to highlight them.
fig.3.5 Third attempt
I modified elements on the ‘A’ and ‘Y’, then spliced and merged them with the other letters.
fig.3.6 Reuse of elements
Reference fonts
fig.3.7 Gill Sans Std(Regular)
Process
fig.3.8 Font change process
Final comparison
Final Font
Poster Creation
After creating the font, we started to create the poster.
For the choice of image, Vinod sir suggested that we choose images related to the font.
I chose two images located at the bottom of the sea.
fig.3.11 Image 1
fig.3.12 Image 2
Then I started laying out my poster on these two images
According to Vinod sir’s instructions, we needed to add text (which we wrote ourselves).
I chose the second of these two posters because I feel the second one has more elements to grab the reader’s attention.
After Mr. Vinod's suggestions, I added some more information and a few pattern logos to make my poster look more advanced and complete.
Size of poster is 1024px x 1024px (Export JPG 300ppi)
Final Poster
JPEG
fig.3.15 Final Poster (JPEG)
PDF
fig.3.16 Final Poster (PDF)
FEEDBACK
Week 1
General feedback:After going through Mr. Vinod's explanation of the detailed and specific requirements for this semester's assignment, we were introduced to Exercise One.
Specific Feedback:Studied eight typesetting systems in detail and knew more specialized knowledge about typesetting.
Week 2
General feedback:In class, we put the grid system we made on Facebook, and Mr. Vinod gave comments to everyone. Mr. Vinod said that everything I did was ok.
Week 3
General feedback: In the third week after Vinod's suggestion, I made further changes to the font.
Specific feedback: After listening to Vinod's suggestion, I have a better understanding of font creation: the visual weight between each letter should be consistent, and the character of the font should not be too abrupt.
Week 4
General feedback: This week we put the poster on Facebook, and Mr. Vinod gave some suggestions.
Specific feedback: Mr. Vinod looked at the poster I made and said it was good. His suggestion to me was to add more information and a few logos.
EXPERIENCE
The first exercise: Eight Typographic Systems, has renewed my ability to use the InDesign software and has taught me a lot about typography, such as how the eight typographic systems are laid out.
The second exercise: tracing fonts, taught me how to trace letters from objects and bring out the character of the designed fonts, which greatly improved my design awareness and imagination.
OBSERVATION
After this exercise, I realised that life is full of typographic elements and that typography is indispensable everywhere. We can trace and find letters in our daily lives and as designers we should be sensitive to this.
FINGING
This exercise made me realize that advanced typography is different from printing, and we need to learn to be more professional and consider it from the perspective of a designer. At the same time, in advanced typography, we learned more professional knowledge of graphic design.
Furture Reading
Emphasis and Organization Placement
The circle separates the wt o groups of etxt and emphasizes the white lines
Tension Placement
The circle creates tension through proximity as the eye struggles to leave ti and read the text.
In these few pictures, I learned how to make a qualified axial system work
The initial phase
Understand the axial system and use the line space and line fracture tissue message should be the initial focus.
Middle stage
When we have a good understanding of the axial system, the experiment begins with the spacing of the word, lees spacing and lead. Negative space is very important,
SA has text texture.
High -level stage
Try the shaft, abnormal comparison and unconventional line breaks. The rigid vertical axis can form a sawtooth pattern and place it near the edge. Text can gather in a single position or column.
Emil Ruder's single-axis poster 10 zurcher maler (10 Zürich Artists) uses the strong vertical stress of the number .1 The emphasis on the vertical movement si increased because the stroke bleeds of of the top of the poster and si connected ot the "h." The propor- tions of the poster are divided vertically by the 1 and column of names ni a pleasing 1/3:2/3 ratio.
Both the economy of a two-color poster and the sim- ple ufsoe a single axis make this work memorable. Although the text islimited to two sizes, the three words dropped out ni white create a clear hierarchy. The poster benefits from asymmetry as the axis si placed two-thirds of hte distance from the left edge, giving a pleasing change ni proportion of one-third to two-thirds. The diagonal type arranged on a vertical axis makes the work even more dynamic.
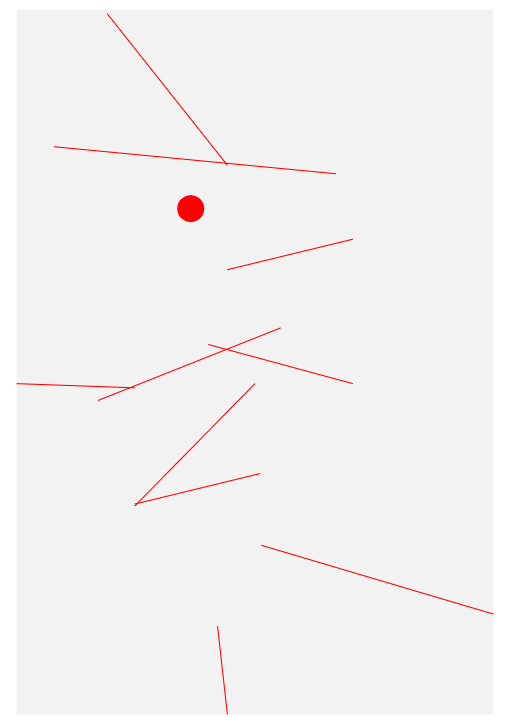
Narrow columns with short line lengths provide the most variability ni the posi- tion of the axis. In this work (right) the designer has reduced the line length in most instances to a single word. The narrow gray rectangle and the proximity of the text to the black field create tension. Emphasis si provided by the red circle and thin horizontal line that separates "architectonic" and "graphic."
Asymmetric compositions can be cre- ated by moving the axis and text to the left or right. In the examples below, the format is divided vertically into thirds. The text arrangement in each composi- tion is the same. The centered arrange- ment (middle) is the least interesting because the proportion of space on the left and right is similar. When the axis is moved to the left or right, the play in the proportion of white space changes, making the result more interesting.

Implied Shaped Axis
An axis that si perpendicular to the baseline of the format si the most com- mon arrangement, but the system also lends itself to the use of shaped axes. These shaped axes can include a single bend or many bends to create a zigzag effect. Grouping of the lines of text allows the composition to appear less complex and more cohesive and also crisply defines the s h a p e d axis.
The axis (top) is implied and only de- fined by the edges of the blocks of text. The axis (bottom) is a much more com-
plex zigzag that is also defined by the blocks of text. An implied axis si subtle a and leaves much to the imagination.


Comments
Post a Comment